Advanced Topics - Unit Tests
Introduction
Unit Tests are a means of coding up a test plan for class-level methods.
Steps
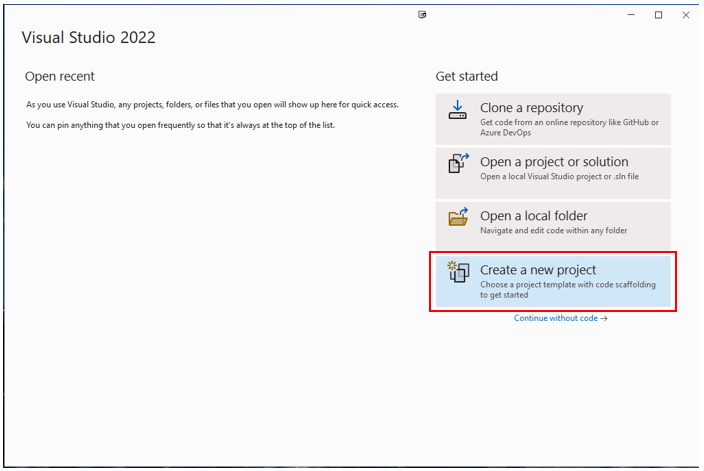
- Open Visual Studio 200 and select Create a new project:
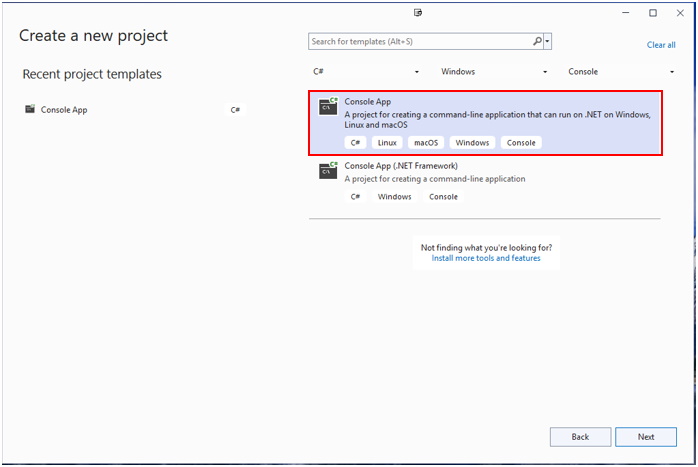
- Select Console App from the choices, and press Next:
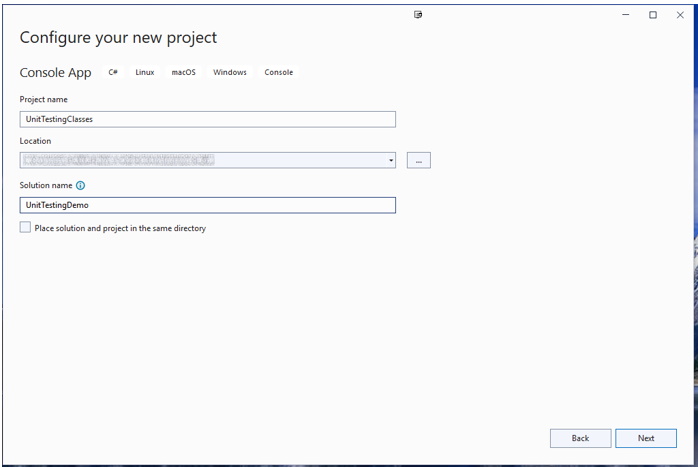
- Give the initial project name UnitTestingClasses, select your desired location, make sure the Place solution and project in the same directory checkbox is unchecked and change the Solution name to UnitTestingDemo:
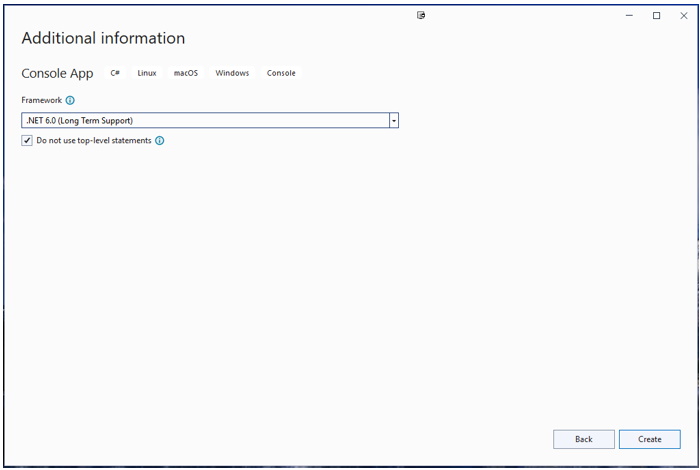
- Ensure the Additional information screen is set as shown below, then press Create:
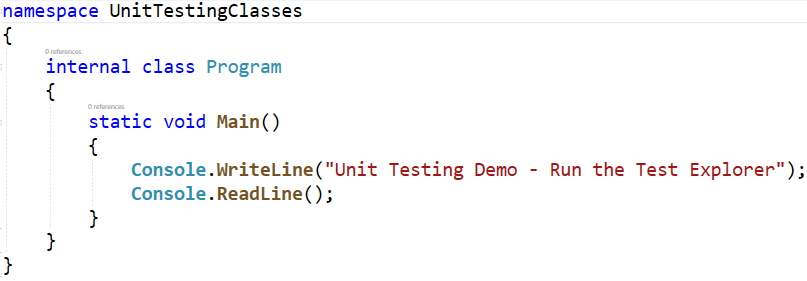
- Once the Program.cs file has been created, change the code to the following:
- It is ideal that all the classes that will be tested be created in a separate folder. Create a new folder in the UnitTestingClasses project called Classes:
- Right-click the project name
- Select Add then New folder
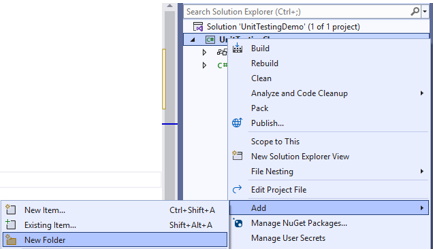
- Rename the folder to Classes
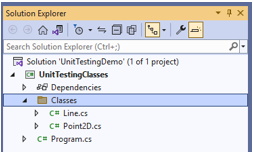
- In the Classes folder, add the following two class files: Point2D.cs and Line.cs
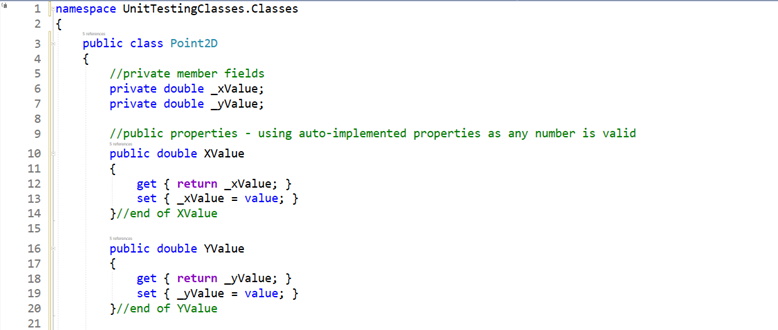
- Each of these classes must be made public so they can be accessed from outside of the project namespace they are in. Modify the code in each file to be:
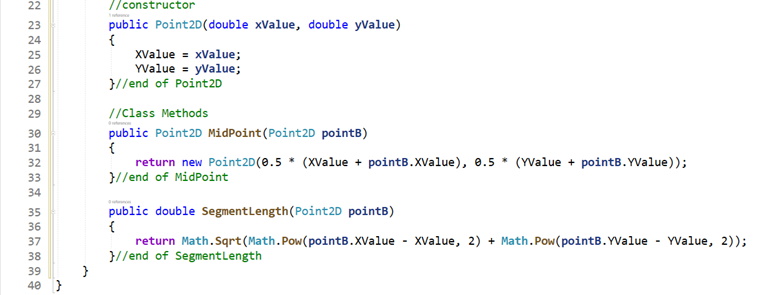
- Point2D.cs
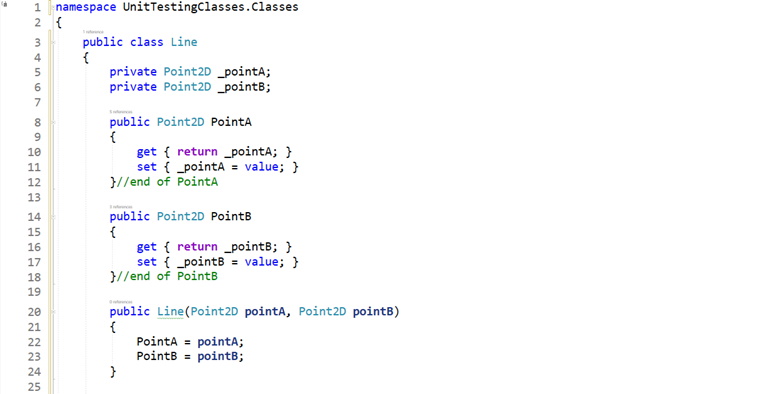
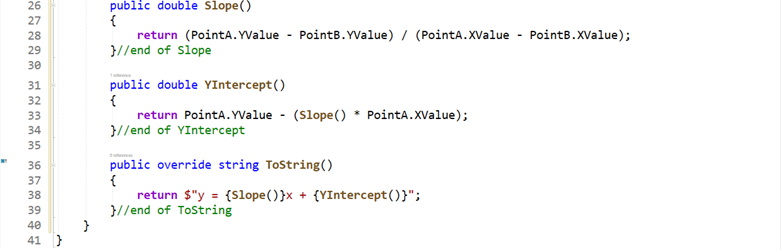
- Line.cs:
- Point2D.cs
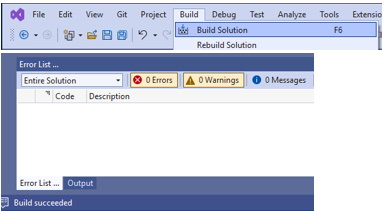
- If everything has been typed/coded correctly, your solution should build without errors; you may receive some warnings which can be ignored.
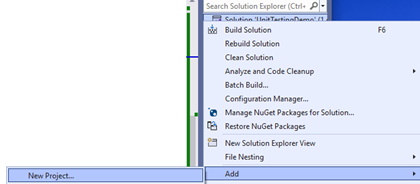
- The next phase is to create a new project, in the same solution (and solution folder) to hold the testing environment. Right click the solution name and add a new project:
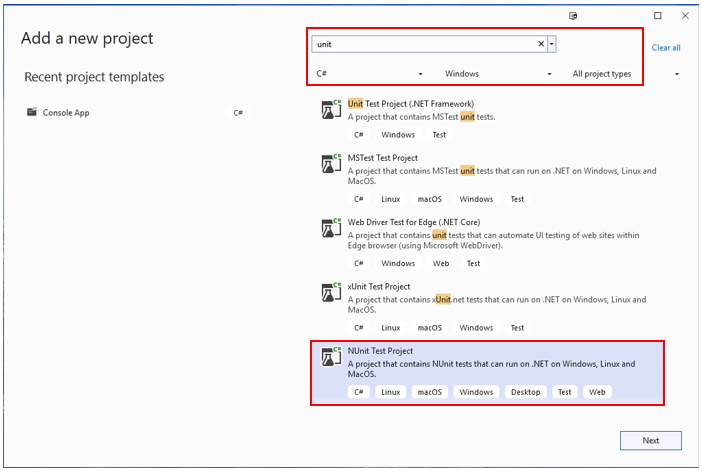
- The project type will be a NUnit Test Project:
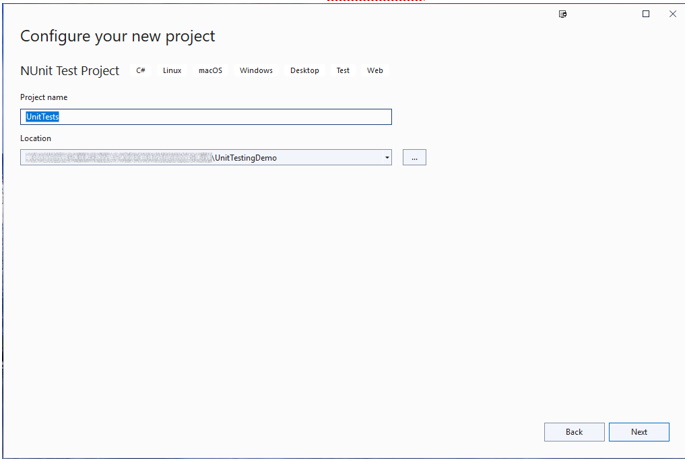
- The name of this project will be UnitTests, (do not change the location) and press Next:
- Accept the Additional information then press Create:
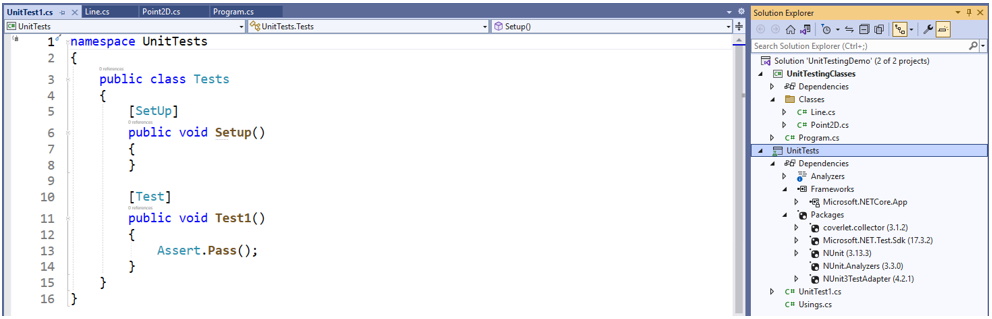
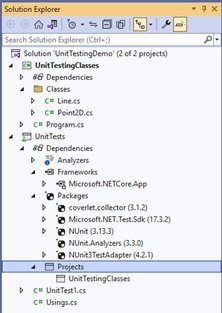
Note: The figure, above, shows an expanded view that displays the additional packages added to this new project to enable unit testing. - The first thing to do is add a reference to this new project so it can find the project that contains the classes to test:
- Right-click the project name, select Add then Project Reference…:
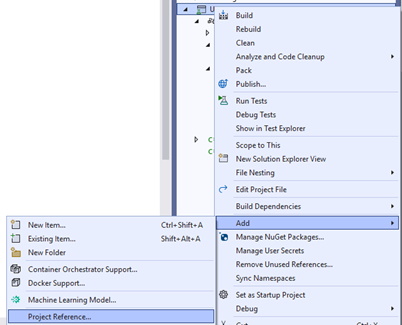
- There should only be one project listed, thus select it, and press OK:
- Right-click the project name, select Add then Project Reference…:
- Just adding the reference to the project is not sufficient for the test project to access the classes in the other project. Add the following line of code above the namespace in the UnitTest1.cs code file (initially this will be greyed out, but that will change once more code is added):

- Inside the
 replace the code with this first block of code (ignore any warning messages):
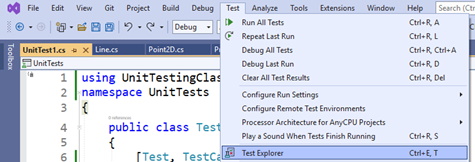
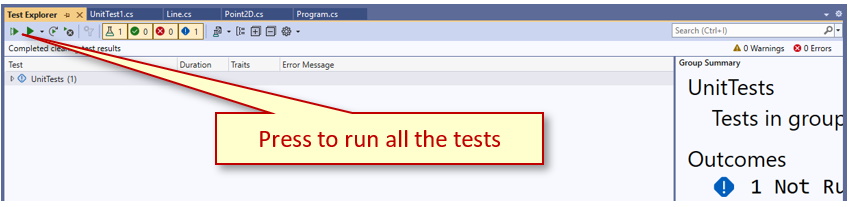
The code above creates a test method with some sample test data. The first 2 lines inside the method create instance of the Point2D class. Following these lines, the code line runs the actual code in the Point2D class. Finally, there is a code line to see if what we expect from our test plan, expected, is the same as the actual value. - To execute the test method created above select the Test menu item and run the Test Explorer:
- The Test Explorer should initially show the following:
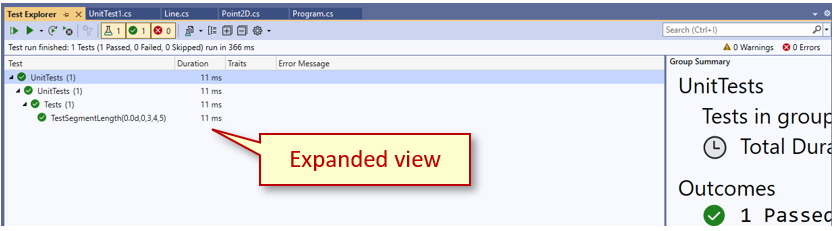
Running the tests should give results like the following:
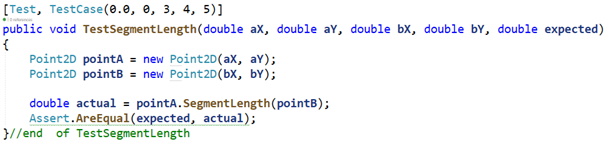
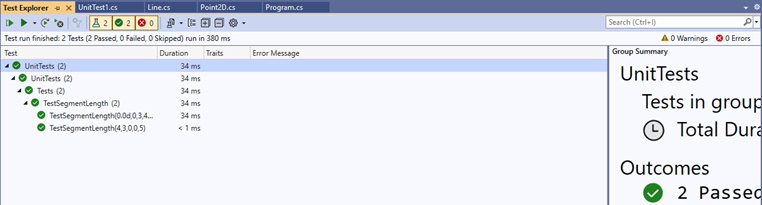
- More tests can be added to test the method. Change the test line to that shown below and re-run the test method:

The results should be like those shown below:
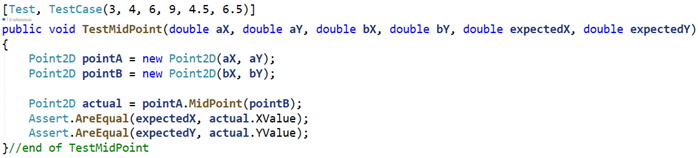
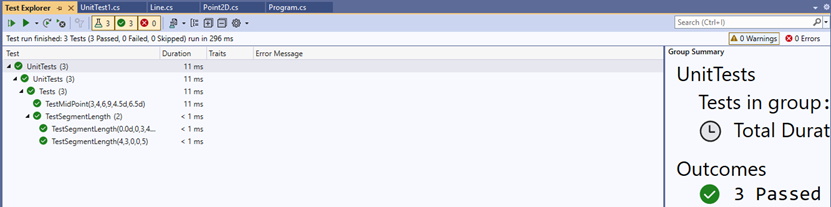
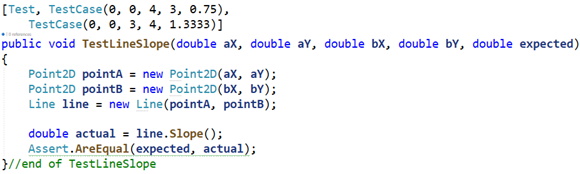
- It would make sense to test the other class methods of the Point2D class, therefore add the following test method below the existing method in the UnitTest1.cs class file:
- Re-run the tests in the Test Explorer to see something like the following:
- What happens if a test fails? Change the test cases for this second test method to that shown below and re-run the Test Explorer:

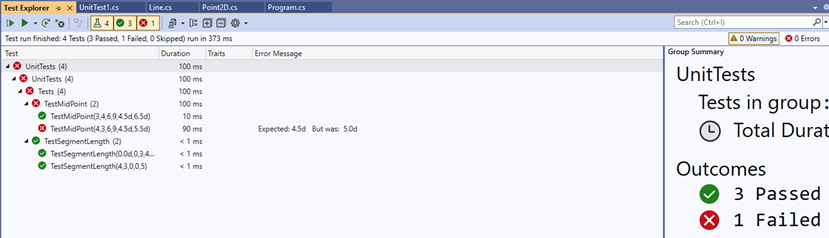
The error is either the test data was incorrect (manual calculations gave the wrong answer) or the class method being tested has a logic error. Which is it? The first step is to double-check the expected results from the given test data.
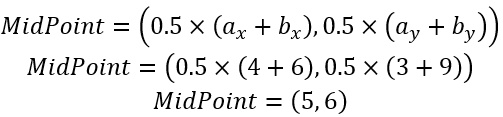
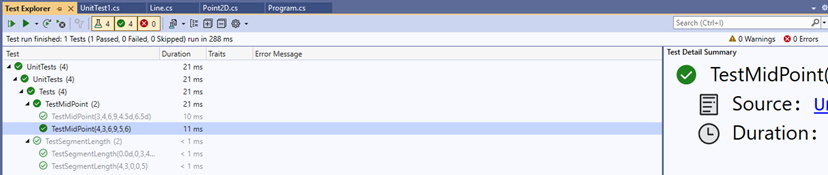
- It now appears that the second set of test data was incorrect for the expected results therefore change the second TestCase (right-click on the failed test to run just that test) to that shown below and re-run the failed test:

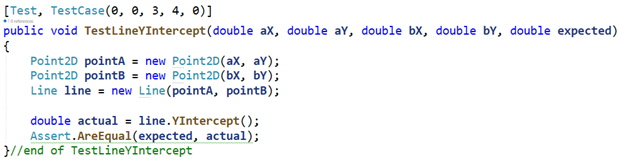
- Now that it is shown that unit tests can be created and run, and failed tests can be checked, add the following test methods to the UnitTest1.cs class file and re-run the Test Explorer:
The results should look like the following:

- Oops! There seems to be a problem with one set of test data. Why nis that? The answer is that the expected value was rounded to 4 decimal places and the line
 expects an exact numerical match to pass the test; even though the results are very close the test fails. [Note: Floating point math in C# is not always accurate, thus rounding errors tend to appear.] When such an error occurs, it is a good practice to use the Math.Round() method. Change the test code to that shown below and re-run the failed test:

Summary
This demo walked through creating a test project, writing unit tests, executing the unit tests, and resolving failed tests. As the main project is still a console application, once all the tests pass any code needed for the application to produce the desired results should produce said results. Currently the console application only gives the following:
