12 - CSS Selectors
The following file is required for this lesson:
Introduction
This demo is a walkthrough of the CSS Selectors Exercise.
Demo Instructions
You can follow along with your instructor to complete this build and/or you can use this document as a guide in completing the demo build.
Steps
- Download the demo-css-selectors.zip file from Moodle and extract the contents.
- Create a folder called demo-css-selectors and copy the extracted contents into this folder.
- The starting solution looks like:
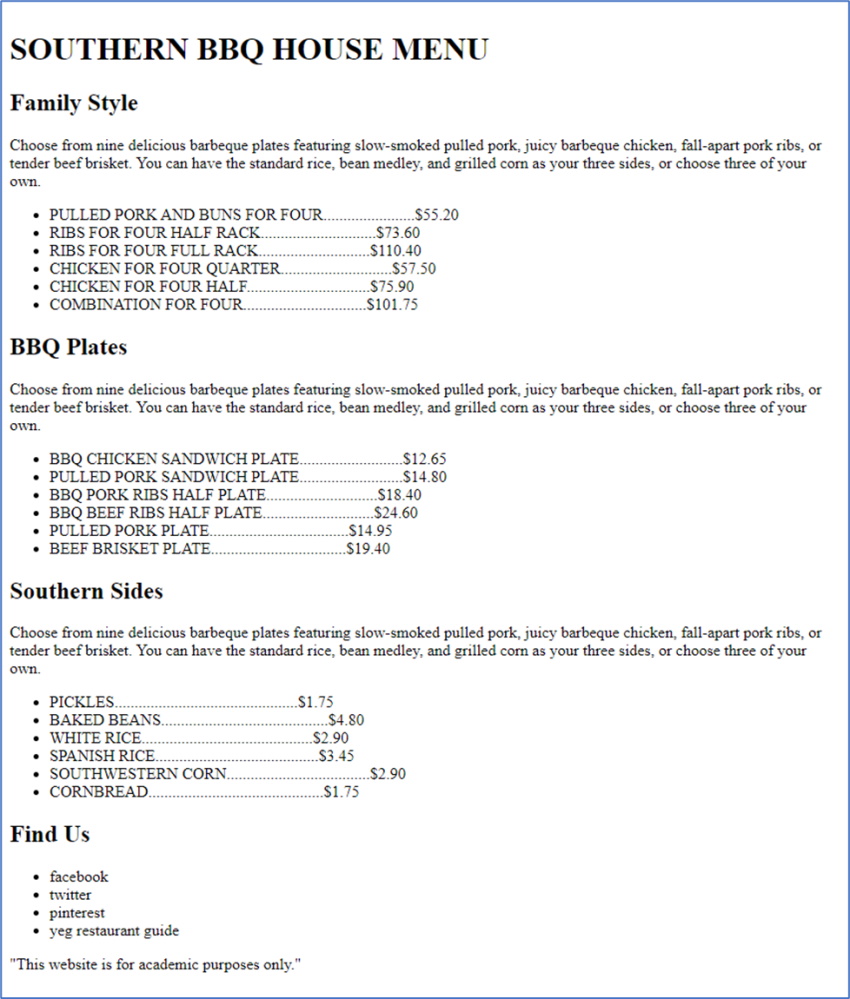
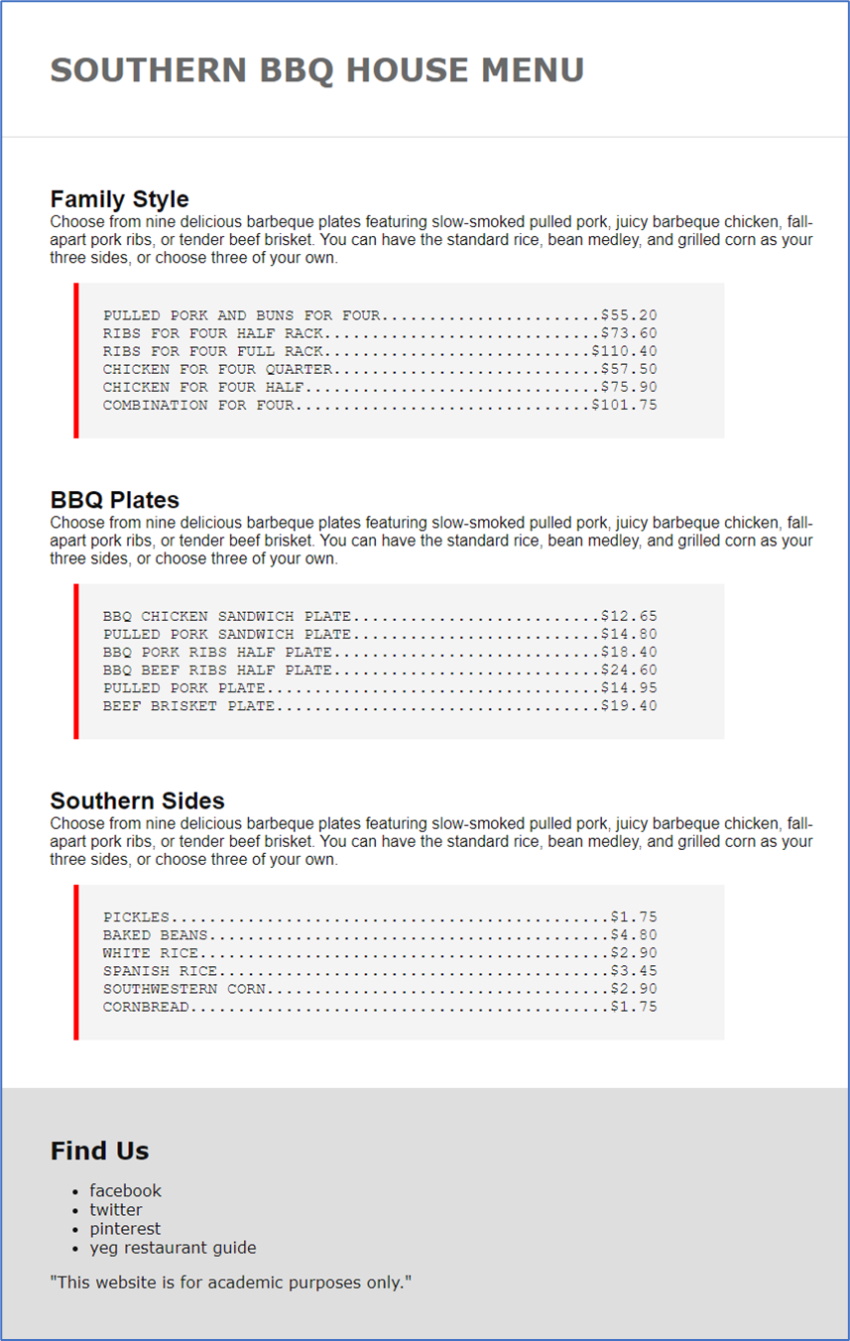
And the finished result looks like:
- The first step is to create the styles.css file in your css folder.
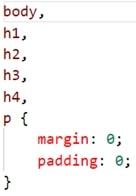
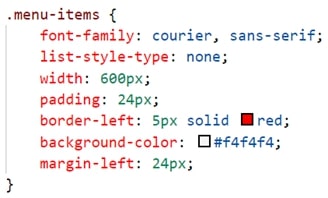
- The code in this file uses the following rules (images shown; the colours shown beside each colour are automatically generated by Visual Studio Code):
- Multiple selector code to set margins and padding:
- Set the
<body>for font and font colour:

- Set the
<footer>padding and background colour:

- Format the
<h1>:

- Create a class to format the items on the menu:
- Format the
<section>element:
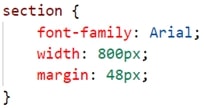
- Multiple selector code to set margins and padding:
- Add the link to the stylesheet in index.html.
- Style the
<ul>elements as shown below:

- Validate your HTML using https://validator.w3.org/.
- Save your work and open index.html in your browser.
Exercise Instructions
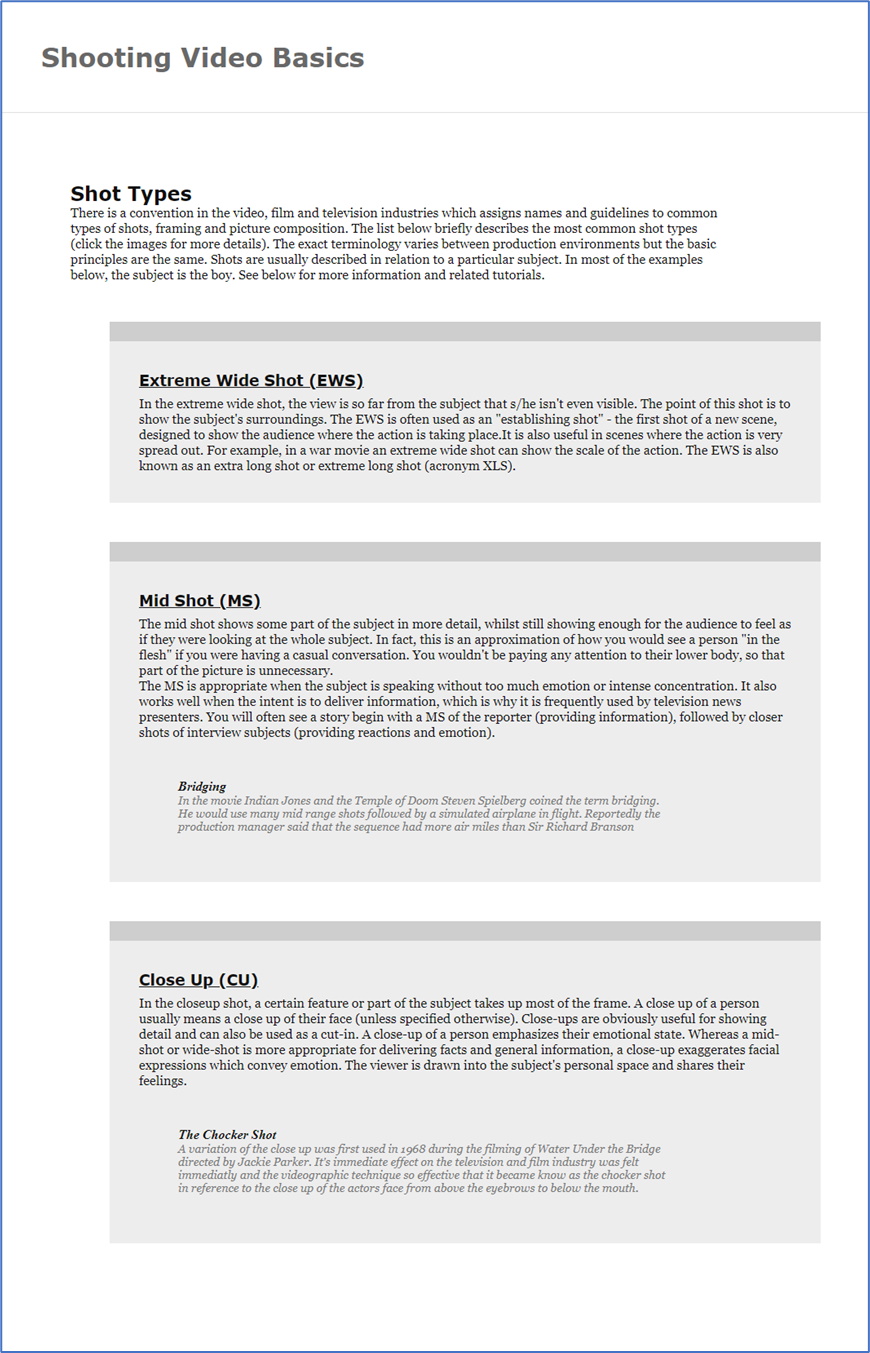
Download the ex-selectors2.zip file from Moodle and extract the contents into a folder called ex-selectors2. You are to create a stylesheet, styles.css, in your css folder. Link your stylesheet to your index.html file. The resulting web page should look like:
Lab Instructions
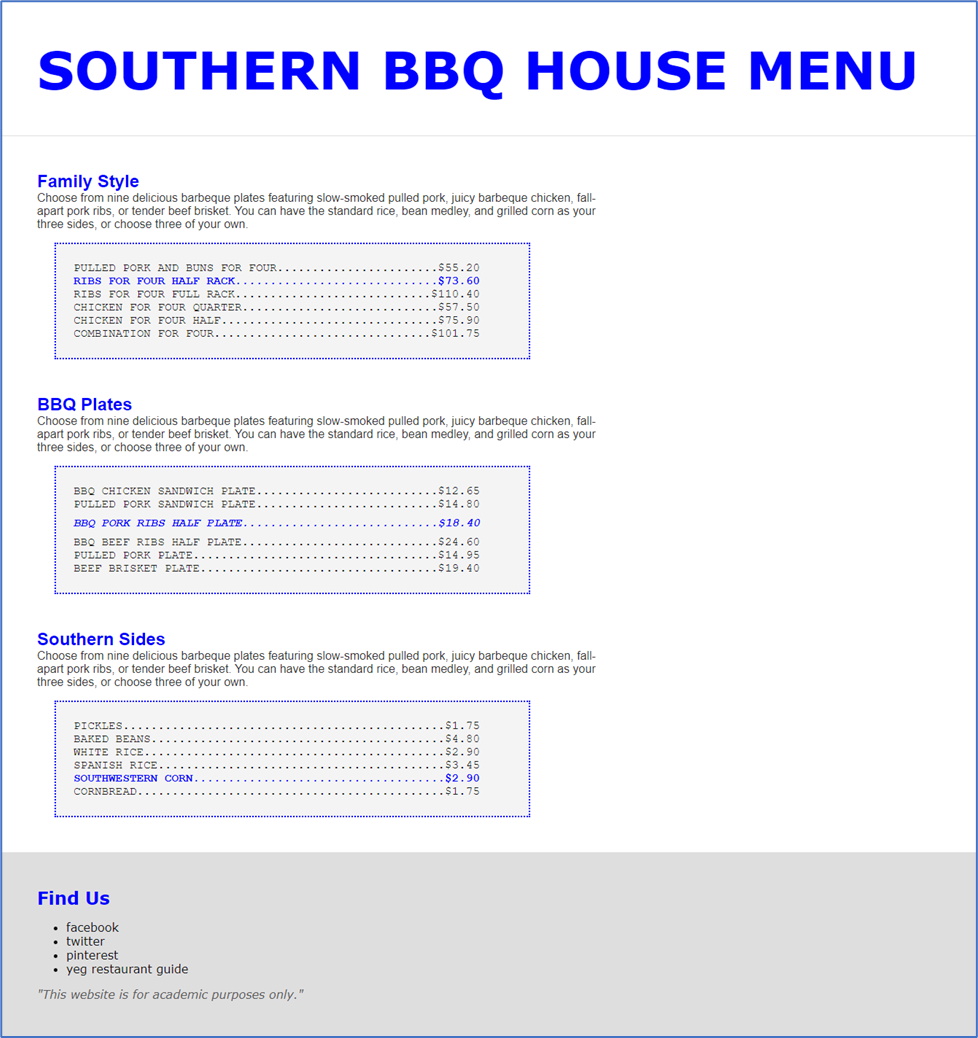
Make a copy of your demo-css-selectors project and name the copy css-selectors-lab. Modify your styles.css, and any necessary changes to index.html to get the following results (the multiple screenshots are captured from a single web page):
Complete and submit your lab following the instructions on Moodle.