08 - Document Outline
Demo Instructions
You can follow along with your instructor to complete this build and/or you can use this document as a guide in completing the demo build.
Steps
- Download the document-outline-2.zip file.
- Extract the contents which contain the copy text that will be added to the web page.
- Create a copy of the framework folder which was built in a previous class (you can download this file, in a ZIP format, from Moodle if you have lost your copy).
- Rename the copy of the folder in step 3 to document-outline-2.
- Examine the copy.docx file to make note of the HTML elements you may need for this build; it is a good idea to make a list of these elements, in the order that you need them, to make the markup easier.
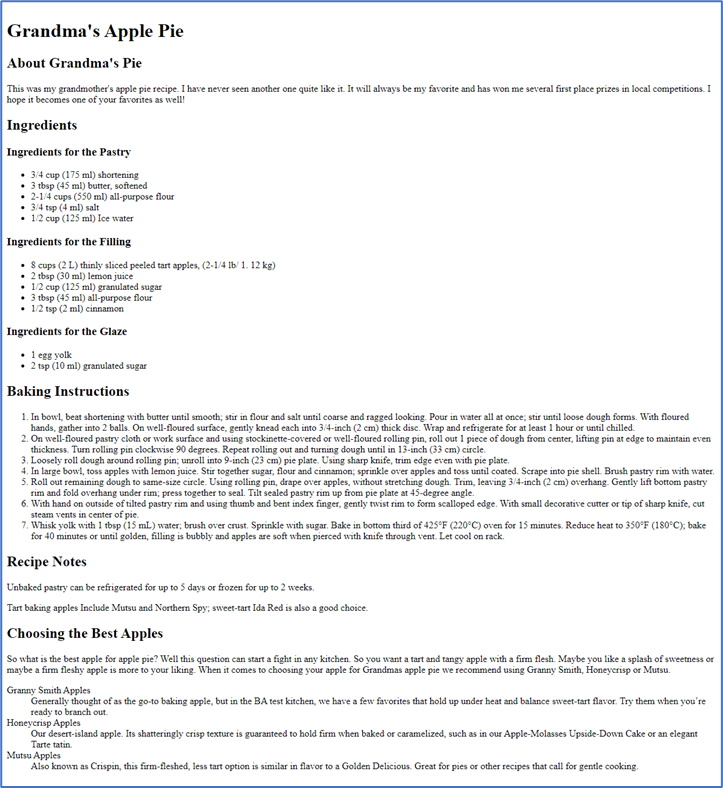
- The final version should look like:

For your layout, each of the second level headings denote that the content below is in its own section. You will also be adding an aside, which has content that is not directly related to the main topic of the web page; it only adds extra information. You will also be using a dictionary list which can be seen on the bottom of the web page. -
The structure of an aside, inside the <main> element, with a dictionary list, will look like:
<aside> <h2> … </h2> <p> … </p> <dl> <dt>dictionary topic</dt> <dd>dictionary definition</dd> . . </dl> </aside> - Validate your HTML using https://validator.w3.org/. Correct any errors before proceeding.
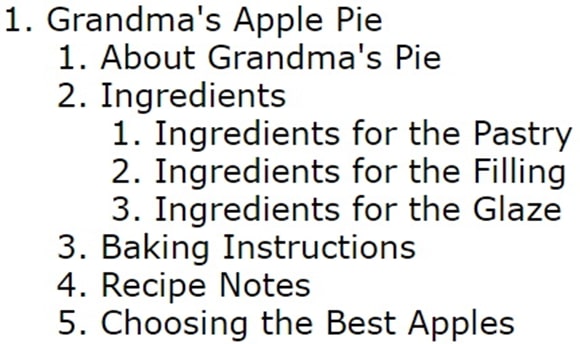
- Check your document outline using https://gsnedders.html5.org/outliner/. Your outline should look like the following:

- Once your HTML has been validated, and you have a valid document outline, open index.html in your web browser. If there are errors, make the necessary correction and refresh your web browser.
Lab Instructions
Download the lab-document-outline.zip file from Moodle and extract its contents and semantically rename the images. The Lab-solution-outline.jpg and wireframe.jpg files are not to be added to your img folder.
Follow the instructions and submission requirements posted on Moodle.