07 - Sectioning Elements
Demo Instructions
You can follow along with your instructor to complete this build and/or you can use this document as a guide in completing the demo build.
Steps
- Download the document-outline.zip file.
- Extract the contents which contain the copy text that will be added to the web page.
- Create a copy of the framework folder which was built in a previous class (you can download this file, in a ZIP format, from Moodle if you have lost your copy).
- Rename the copy of the folder in step 3 to document-outline.
- Examine the copy.docx file to make note of the HTML elements you may need for this build; it is a good idea to make a list of these elements, in the order that you need them, to make the markup easier.
- The final version, only showing the first few sections, should look like:

For your layout, each of the second level headings denote that the content below is in its own section. -
The structure of a section, inside the <main> element will look like:
<section> <h2> … </h2> <p> … </p> <p> … </p> </section> - Validate your HTML using https://validator.w3.org/. Correct any errors before proceeding.
- Check your document outline using https://gsnedders.html5.org/outliner/. Your outline should look like the following:
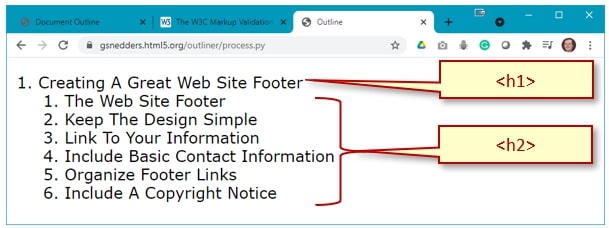
- Once your HTML has been validated, and you have a valid document outline, open index.html in your web browser. If there are errors, make the necessary correction and refresh your web browser.
Exercise Instructions
Download the document-outline-ex.zip file from Moodle and extract its contents. Make sure you semantically rename the image. Your web page needs to have <header>, <main>, and <footer> sections. You will also need to organize your <main> into <section>s. You must validate your HTML and create a valid document outline: